how to get on Youtube to promote your website?
In a previous section, we discussed the reasoning for being on YouTube, now let's discuss how to get onto YouTube.
As we stated before, the topic or subject matter should cover something that you have an interest in, or about which you want to know more. If you start with that premise in mind, the ideas will begin to flow.
As a means to define your core values, your videos can also be a branding showcase. Start by identifying the benefits of your genre, and then end with a pitch of your brand. But be very careful not to become a long-drawn-out, self-promoting commercial. We know that we are repeating ourselves. But it is imperative to avoid the urge.
You can also make instructional or how-to videos. Education is one of the primary reasons that people go to YouTube, i.e., to get ideas or solutions. Over 50% of YouTube's content is instructional.

Entertainment is also a prime reason for creating videos. Passing the time watching videos encompasses 28% of YouTube viewing.
Finishing the statistics, YouTubing shares these two viewer motivations at 19% each:
- understanding how the world works and what is happening
- product evaluation for purchase decisions
(Source: Pew Research)
A helpful suggestion, prepare a list of possible areas of your subject that you would like to cover on your YouTube channel.
Make that list rather extensive. The more you can put to paper, the more likely you will be able to hone in on what genuinely will be of interest.
Your best topic will be a distillation of ideas. A good source of what is relevant on the Internet is Google Trends (trends.google.com).
On Google Trends, you enter a search term and instantly get results for that term's popularity over time and its strength for that period. The utility also categorizes the information geographically. You can also use related keywords or search terms to get an indication of which approach will work best.
Google Trends is a handy and easy-to-use tool.
Now that you know what type of videos you are going to make, let's see how to do it.
how to get on YouTube?
The mechanics of setting up a channel is not that difficult.
The first step is to create an account so that you can access YouTube and all of its amenities.
If you have a Google account, you can just go to the YouTube login and use your Google ID and password.
Once you are in your YouTube account, click on the upper right corner to reveal a menu, and click on the link "Create a channel."
Here is where to have to make a choice. Choose whether to use your name or a custom name to brand your channel. This decision depends upon the motivation for your channel.
If you want to promote yourself and cover various topics that are of interest to you, then your preference may be to use your name. But if the platform is about a particular subject matter, then you may be better suited to pick the custom name option.
In this way, you can brand your channel, and tie it into your domain name or company/trade name.
By the way, you can change your channel name at any time if, for some reason, you have a better idea once you get into it.
The rest of the process is rather simple. Just follow the directions, and you are on your way to producing your first video.
what do you need for your first YouTube video?
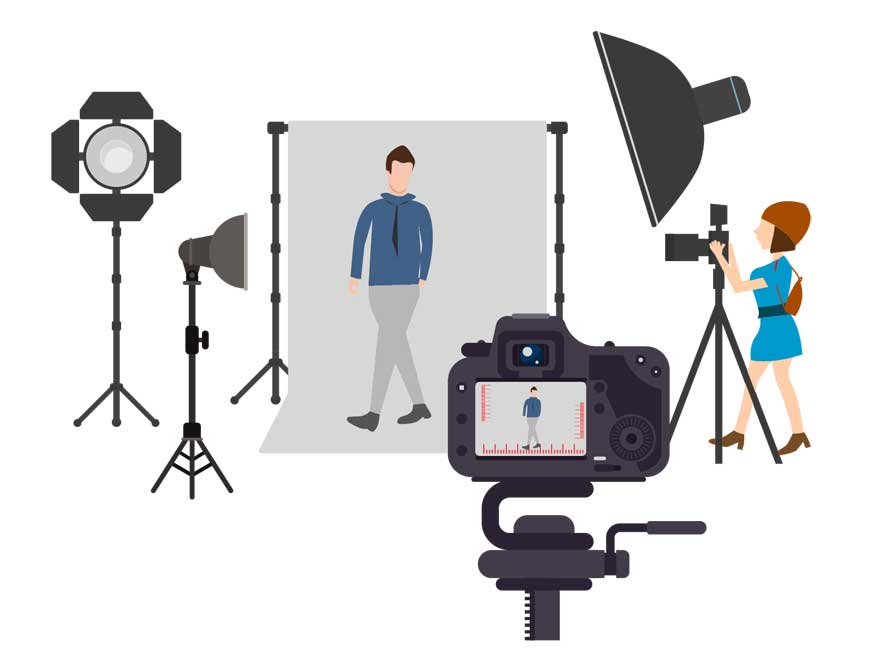
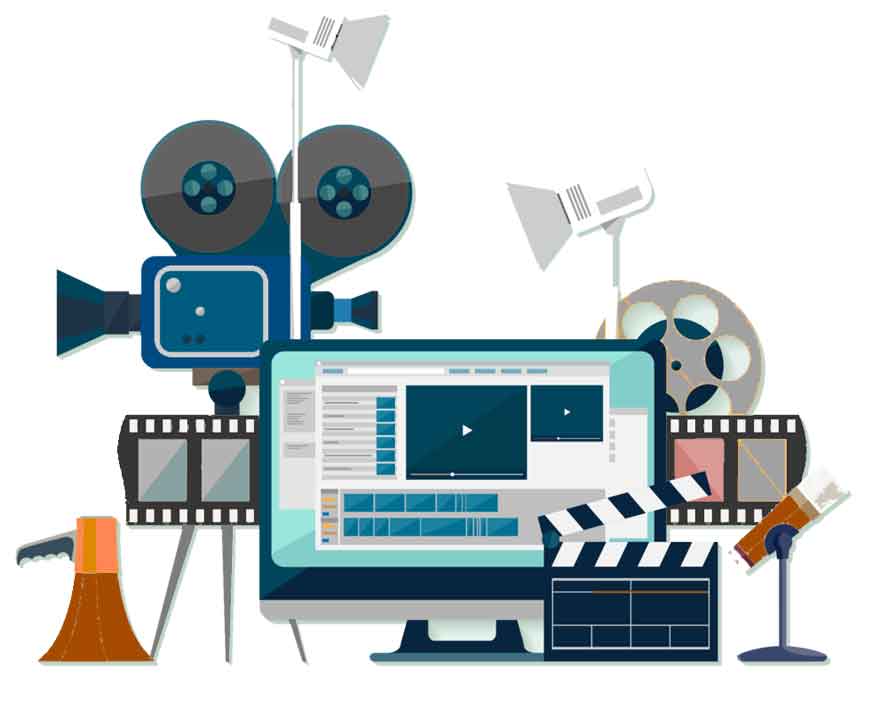
To make a video, you are going to need some equipment. There is no getting away from that fact. But nothing like the amount shown in the illustration.
If you are on a limited budget or do not already have all of that fancy equipment, here is what you will need to start. You’ll see how inexpensive it is once we explain how to do it:
- video recording device
- lighting for interior/exterior shots
- sound handling gear
- software to edit videos
One of the biggest mistakes newbies make is that they spend money that they do not have, or impulsively dole out cash prematurely on equipment. Most times, it is an extravagance and not a necessity in the beginning.
here’s a bare-bones YouTube budget!
Just from the standpoint of proper fiscal budgeting, we would not suggest spending $500 to $1,200 on a Go-Pro or Cannon for your first try.
On a bare-bones budget, you can start by using your cell phone.
Depending on the age and tech of your smartphone, you would be surprised how good some can record.
Amazingly, there are many very popular vloggers out there that use their smartphones in a pinch when their expensive cameras are not available. Like when batteries are dead, or they just do not have their camera with them.
Recently, a professional filmmaker videoed an entire feature film on a smartphone!
If it is good enough for professionals, it should be good enough for you to try your hand at it.
Hint: Typically, the forward-facing camera on the back of the phone has a better lense for shooting videos than the self-facing camera.
what is the best way to do smartphone videoing?
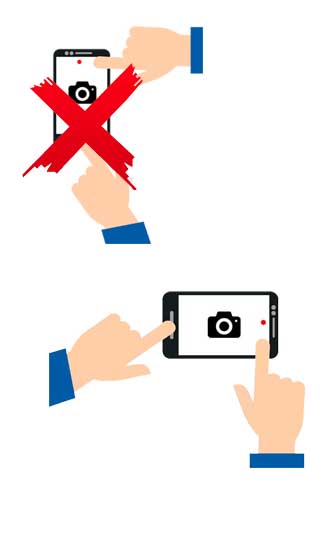
If you do use your camera phone, please do it so that it is in landscape view (horizontally) and not portrait (vertically).
That up and down perspective tends to look like the shot was done on a smartphone. Equally important, when viewed on different types of devices, there isn't enough to fill the screen appropriately. For these reasons, the vertical perspective will give the video an amateurish look.
Another mistake is "filming" too far away from the subject. The farther away the lens of a cell phone is from the subject, the more distorted and granular the image will be. And using the zoom function is not the answer.
The lens adjustments on smartphones are made digitally and not by optical zoom. Most cell phone cameras have fixed lenses that do not magnify as a conventional camera would by moving and changing the focal point. What happens is that the cellphone's software enlarges and crops the shot so that it appears as if the lens has magnified it.
Using the digital zoom will only increase pixelation, which will diminish the picture quality.
Some smartphones do have multiple cameras built-in, but the results are not like the telephoto lens of a camera.
So, make sure that you are close enough to your subject to maintain clarity.

how to manage lighting conditions?
The artificial light from your smartphone flash for interior shoots is deficient as best.
If additional artificial lighting is not available, try to shoot your video near a window. It will provide a dramatic look to your finished product, but also it is the cheapest source of light.
A piece of aluminum foil directed from the window light can also help to brighten shadows on the subject's face. It will also add some more drama to the setting.
But the weather can change in a moment
That means that the availability of artificial lighting is a necessity.
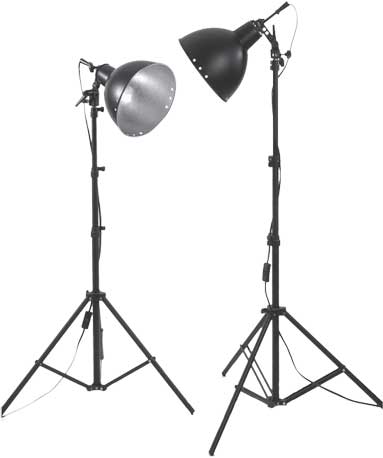
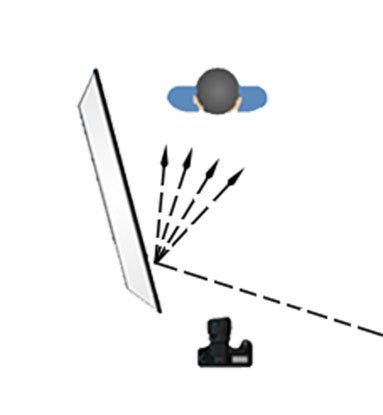
To do it absolutely on the cheap, take table lamps or work lights that are handy. Remove the shades and create bounce lighting with the use of a white project board that is available at any Walmart or Dollar Store for a dollar or two.
Just place the project board behind the light source so that it will reflect upon the subject. To further adjust the lighting effect, just move the light source or the subject of the shot to get the effect desired.
If you have $20, go to the hardware store and buy a couple of clamp lights. Arrange them around the subject and aim them to bounce off the ceiling or a light-colored wall, which will soften the lighting.
Using a day-white bulb gives the effect as if filming at noontime under a full sun (marked as 5000K bulbs). Any less than 5000K will cast from a yellow-white to off whiteish tinge.
If you want to experiment, try other bulb temperatures to produce the effect you desire.
Also, using a paper towel or an opaque shower curtain as a diffuser will soften the harshness of a bare light bulb, when shooting indoors.
Outdoor recording can bring many challenges, like wind, rain, snow, extreme temperatures, and pure lighting.
Here are a few tips for filming outdoors:
- Using the "golden hour," that is the time just before sunset or after sunrise, as a lighting source is both compelling and challenging at the same time.
- The golden hour is a brief period when both sides of a subject's face are devoid of any shadow. Consequently, its time constraints make it impractical upon which to rely.
- The natural sunlight, if available, is a useful backlight for headshots. Make sure that the head of the subject blocks out the sun's direct rays. When done correctly, the method delivers a radiant effect.
Another combat with filming outdoors is during the middle of a sunny day. The harshest shadows occur at this time of day; as a result, the light needs diffusion. A solution is to take the shot under a tree for shade and use sheets of aluminum foil wrapped over cardboard as diffusers will help.
Cloudy days, at times, are nature's way of providing diffusion. Surprisingly, acceptable results are possible on days like that.
Overcast conditions eliminate shadows, for the most part, but be aware that they can change in a moment. You can go from cloudy to sunny without notice, making it difficult to stage your scene.
Shooting outdoors can be visually rewarding or demanding. No doubt, being able to control the environment is impossible, and you have to make the best of what you get.
We suggest that if the premise does not require an outdoor location, film indoors.
is the sound quality with a smartphone okay?
When it comes to sound quality, let's just say that the quality of the audio is just as crucial, if not more than the video.
Poor sound quality can be particularly the situation with exterior shots due to wind and background noise.
As recording outside has its hitches with sound, so does recording indoors. And that built-in microphone on your cell phone may not be the best way to do things. Conditions like high ceilings, hard surfaces, or background sounds can create distortions that are amplified by the capabilities of the cellphone mics.

It is not hard to imagine what is going to happen if viewers cannot understand what is said, or if the sound level is too low or irritating. They are going to click immediately out of the video.
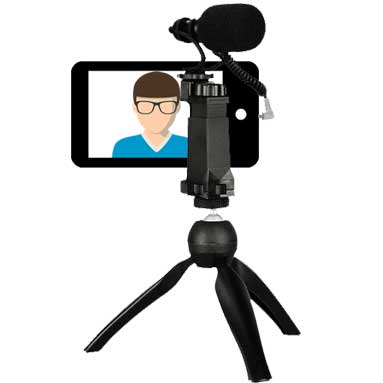
The microphones on smartphones are omnidirectional; that is, they will pick up extraneous sound that will interfere with your audio.
The answer is a mini directional microphone for a smartphone. This item is very inexpensive, and we have seen some for as little as $10.
For about $50, there are entire kits for recording on cell phones that are designed explicitly for helping YouTubers. Most of these outfits include a shotgun/directional mic, mini tripod, external lighting unit, and some even come with software for editing.
Another feature to watch for in buying a kit is if it is compatible for use with a conventional camera. It will save a few dollars when and if you graduate to camera filming.
For those who are camera shy or just want to do voice-over recordings for their videos, there are podcast microphones that provide nearly studio-quality audio for $50 to $60.
This type of setup is ideal for a screenshot recording, voice-over, or in-studio videoing applications. It comes with an arm that attaches to a table or desk, allowing you to use your hands to operate your computer or perform something manually while recording.
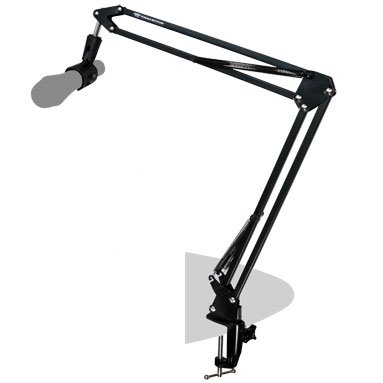
Excuse us for being redundant, but the audio quality is unquestionably critical, even more so than picture quality, for your video to be compelling. Paying attention to production aspects, like sound quality, will make postproduction, like editing and sound balancing, straightforward and less time-consuming.
a few more bare-bones videoing tips
Here are a few more quick tips for bare-bones videoing on a smartphone:
- Smartphones need a considerable amount of lighting to give a quality look for indoor shooting. Your built-in camera flash does not have it to get the right results. (See phone recording kits above.)
- Use the exposure lock in the "on" position when shooting a video. Otherwise, the phone will continuously refocus or adjust, which will make the image look fidgety.
- Do your editing on your computer, and not on your phone. Many free software apps are available that do a far much better job of it, and it will be a lot easier.
- Whenever possible, use a tripod. If you don't have one, hold the phone as close as possible to your body to avoid wobbly images.
Now that you have your first video "in the can," how do you make it a finished product. To keep in line with our bare-bones budget approach, here are the cheap ways to produce quality-level videos.
what software do you need for video editing?
There is no way to get around it. You need to edit your videos if you want to get viewers and if you want them to become followers.
Probably the most indispensable step in bringing videos to YouTube is postproduction.
Before we get into editing software, YouTube offers a simple tool called YouTube Studio.
YouTube Studio is an administrative tool and not an editing tool. Nonetheless, Studio provides these free and helpful utilities plus a few more:
- channel analytics like number of subscribers and channel earnings
- filters your videos by categories
- real-time statics on how a video is doing and the ranking of all your videos
- defines the origin of subscribers
- administrates viewer comments and responses
- monitors the use of your videos by third parties
- restrict misbehaving channel users
- lists of open source copyright-free music and sound effects
- schedule launching of videos

For tracking your channel, YouTube Studio does a reasonably good job, particularly in the area of analytics.
From the channel dashboard, you can drill down and massage all sorts of information regarding traffic, user demographics, and video acceptance.
As stated early, Studio is not an editor, and to be honest, YouTube Video Editor is also not a full-featured video editor either.
is YouTube Video Editor useful?
What we will cover in this section is what you can and cannot do in the YouTube Video Editor.
First, you have to be aware that you cannot access the Editor until you have uploaded at least one video. And that is done by clicking on an existing video inside the Studio utility.
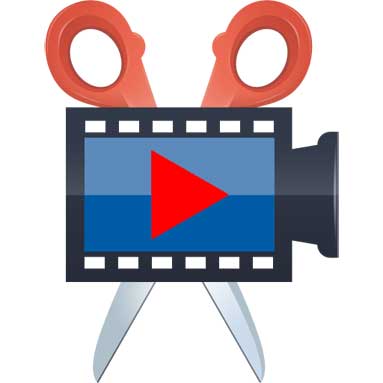
The greatest failing of the Editor is that you can shorten or delete footage or segments; however, you cannot piece footage together. The ability to splice two videos or even add an introduction or a signoff called an "outro" is not an available feature.
The real reason for it, which you will realize when using it, is to correct any infringing copyright segments without totally deleting the video and reuploading it. Any video that had a copyright problem would not have to be banned or removed from YouTube. The video could have the violating portion removed, and the resulting recording can remain active on the channel.
A similar capability is called "blur." What blur allows you to do is make someone's face become obscured, or an area on the video, so that an intrusion into privacy or an inappropriate scene is not viewable. Once set up, the blur feature will continue throughout the video on the item tagged.
Another utility allows you to add what is called an "end screen."
An end screen is the final section of the video when a promotional overlay appears that directs the viewer to click the next video. This prompt can be a video on your channel or even to someone else's.
There are a few other utilities on the Editor that are of lesser value. However, your time is more productive if we expend the effort on a few editors that have better functionality and ease of use.
are free video editors capable?
Before we get into how video editors should perform and which are the better ones, we will cover an area that many on the Internet treat extensively. But it is not that important in reality.
The point is that most of the free editors do not provide 4K video support (which stands for 4000-pixel wide resolution and represents UHD or Ultra High Definition.) That does not mean that shooting in 4K for YouTube will affect any discernible degradation of video quality if you are editing with non-supporting 4K software.
Ironically, recording in the lower resolution of 1080p will take appreciably less space to store the finished product, without the average viewer noticing the difference. Similar to conventional printing, which improves when there are more dots per inch, videoing in formats that have more progressive scans also improves viewing quality. To briefly explain progressive scans, think of the process as a series of horizontal lines running across the screen to form the images of the video.
It is apparent that 1080p is better than 720p, and 4K (which is actually 3840p) has more definition than 1080p. But remember 1080p is effectively HD (high-definition), as is 720p. And YouTubing is not feature-film production. For our purposes, we are filming on smartphones, so using 1080p versus any other resolution may be the most preferred way to go.
Want to throw some more confusion into the process, 8K is also available.
web-based or client-based video software?
Whenever possible, our attitude is that the program should not be a server or web-based application for several reasons.
Fundamentally, server or web-based means the software resides somewhere other than your local computer.
In our opinion, there are plenty of reasons why we would prefer software on the client-side, that is, that the software resides on your local computer.
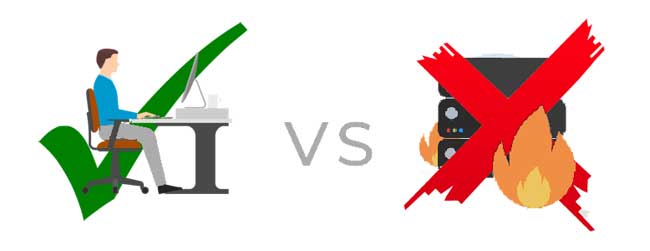
Our inclination is always to have the software in our hands under our control, even if it is free. That is because the software application on your computer is available uninterruptedly.
- As long as you have access to your computer, you will be able to edit your video. If your Internet connection is down, or the Wi-Fi system is not up, guess what.
- Secondly, what if the provider's very own website comes under attack, or they go out of business. The software company's server is down or gone for good. Guess how that leaves you.
- Finally, if your videos or files remain on their servers and you have a dispute, or they have a change of policy, will you have access to your data?
By the way, web-based or cloud applications are beneficial for the software manufacturer much more so than for the user. It is easier to produce, distribute, and control, versus manufacturing and distributing hundreds of thousands of individual copies.
For example, a new program or an update means providing a new download, not producing and circulating copious disks, with the cost of accompanying packaging and documentation. Yet, with downloads, they get to charge the same revenue for the update or latest version.
This thought process is also one of the primary reasons behind subscription software versus outright purchase.
Sorry for the rant, but these are two of our most significant sore points with Silicon Valley.
Let us get back to our discussion of video editors and what they should do.
what should a free video editor provide?
Before we begin, one thing to note is the capacity of your computer to handle the requirements of the software. By that, make sure you have enough firepower.
That means a minimum of a quad-core processor, 16 GB of RAM, and a graphics card with 2GB video memory. If you want to do 4K videos, you will need substantially more power for the software to function correctly.
As for the software itself, there are basic functionalities that a decent video editor should provide, even if they are open source (free) software.
Here are some of the most common and important features that editors should have:
- easy drag and drop user-friendly interface
- export feature to YouTube
- ability to do color grading
- a useable text tool
- have green screen and animation capabilities
- multiple camera support
- ability to function on multiple operating systems
- audio mixing and video scrubbing capacities
- has a suite of color correction tools
- have playback and review functions
- provides transitions and popular visual effects
- exports to file or disc
- has good tutorial and documentation capabilities
- picture-in-picture functionality
Desktop versions of video editors tend to be more robust and feature-filled than mobile apps. Apps for cellphones neglect to have automated features and often require a manufacturers' watermark.
Shortly, we will give brief reviews and specs for a few free video editors that have the functionality you need to do a quality job. These editors are here because of their versatility, ease of use, and adaptability for various viewing formats.
Granted, they do not have all of the bells and whistles like those which will cost you something. Still, for those who have a low threshold of knowledge and a tight budget, these will get the job done, and we found it to be beginner-friendly.
OpenShot
Designed for Windows, Mac, and Linux editing, OpenShot and its ability to be downloaded to your computer fulfills two of our critical requirements.
We found their interface intuitive and easy to resize, rotate, trim, scale, and trim. OpenShot is ideal for the basic up to small-level production work and generates finished results equal to professional editing software. It is also one of the easiest for beginners to use.
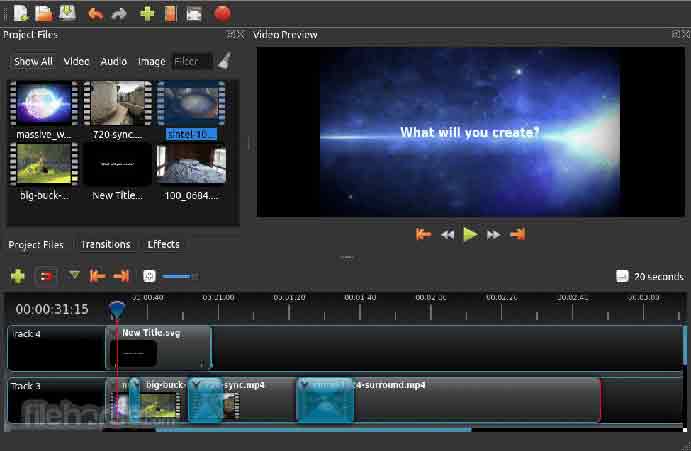
Here are the highlights of OpenShot's features:
- remove backgrounds and change background colors
- effortlessness in adding titles
- smooth slow-motion, reverse, and speed up
- drag and drop video and audio editing
- unlimited layering to add proper effects
- fade, bounce, and animate capabilities
- 3D rendering with titles, special effects like snow, flares, and flying text
- easy import of video
HitFilm Express
Again, we have an editor that can reside on your computer.
HitFilm Express requires registration and activation once on your machine and requires a little more time to learn, but the results are worth the energy.
This editor is available in Windows and Mac for both the free Express version and the full professional application. The upgraded Pro version is an extraordinary application, complete with all of the features needed to produce professional videos.
Linux is unsupported in either version.
Note that there are plenty of addons (interpret as optional items at additional cost) that appear in the free Express version. If you click on one of the optional add-ons highlighted in the Express format, be aware that it will add HitFilm's watermark to your video. You will have to pay for it to remove it.
The user guide and tutorial videos are valuable and packed with ideas and helpful hints.
As for disadvantages, HitFilm cannot burn directly onto a DVD or Blu-Ray, and there are some limitations when trying to export to some platforms. Still, it is more than satisfactory for YouTube.
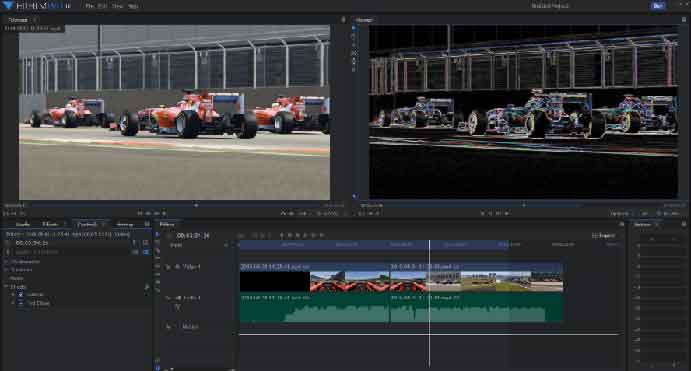
We found that the control panel has quite a bit of flexibility and functionality for clean and precise editing and the features and built-in applications are noteworthy:
- layer and track locking to protect unintentional changes
- create default interface settings for personalization
- schedule exporting and automatic resume for unfinished projects
- adapts from smartphone to professional camera content
- extensive animation and composite composition
- unlimited layers or tracks for video or audio for timeline building
- ability to retrim clips after being added to the timeline
- professional-level audio mixer for each track
- green screen and color correction
In a nutshell, HitFilm Express can be a remarkable free editor that can perform at a professional level. If you are up to the challenge and do not mind a relatively high learning curve, despite good tutorials, this editor can bring some real satisfactory results. Just be aware that getting some of the bells and whistles can run up the cost.
DaVinci Resolve
In DaVinci Resolve, we have another cross-platform editor, i.e., works on Windows, Mac, and Linux. The difficulty spectrum shows Resolve to require a little more effort, but the level of results is entirely professional.
Most find opening the software's interface for the first time a little unnerving; however, with a review of the numerous how-to's on YouTube, one can quickly see the authority of this software.
The way the interface allows color corrections with nonlinear video editing through professional tools and how its integrated Fairlight audio app makes Resolve one of the most powerful editing tools available. And it is free.
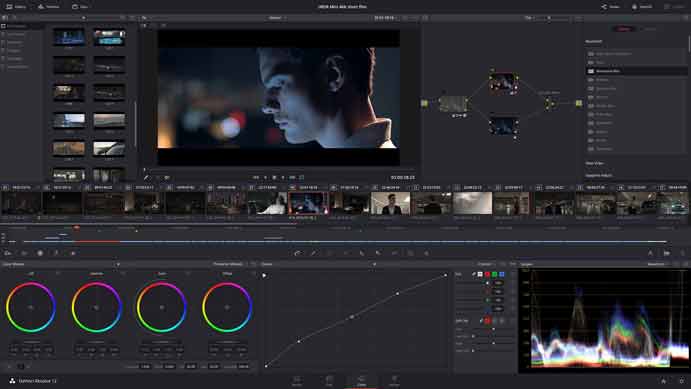
Here is a rundown of some of what is in DaVinci Resolve:
- multiple timelines that stack for sync editing
- copy and paste commands for timelines
- ability to do collaborating with other team members
- the convenience of drag and drop track elements
- auto pitch correction in playback mode
- ability to remove unwanted images in scenes
- visual effects applied from the interface
- limitless color control tools
- sound finishing and mastering in one place
- excellent stability; nearly crash resistant
- incorporated sound library
- customizable keyboard shortcuts to save time and effort
- automated dynamic zooming and swipes
It also runs equally well on a laptop or desktop machine.
DaVinci Resolve is part of Blackmagic Design and is an industry leader and premium developer of video cameras and equipment. It is no wonder that it is among one of our picks for video editors.
YouTube received a great deal of attention. Still, we believe that it is one of those marketing gems right in front of us. With a little effort, its integration will yield exceptional results in enhancing branding.
what makes compelling content?
We have finished dealing with the subject of "content."
In doing so, hopefully, we focused on the who, what, when, where, and the why of a site.
But the effectiveness of your content is whether or not the audience responds to the site. That is, the visitors not only land on the site but also do what you want them to do. Simply put, generate traffic and affect decisive actions.
From here, we go to the more fundamental components of the building; that is, the structural pieces that carry the message.
Most treatments of "how to build a website" usually begin with the structural elements. But we have purposely done ours in reverse order.
Why?
We did not want our readers to get hung up on the mechanics without understanding that content is more vital than structure.
Now you can implement the principles covered in the content area and apply them accurately and effectively to the structural side of the website creation.

You will see what we mean in the following segment.

